Kitsune Evolution Pets Tier List
Progression ranks for egg pets so every hatch pushes stages and rebirths faster.
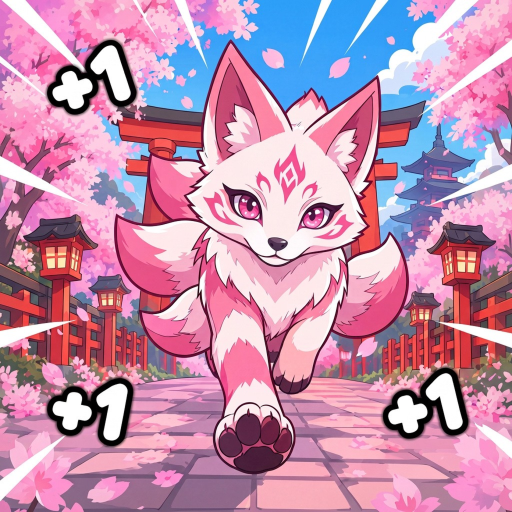
This Pets Tier List ranks companions in +1 Kitsune Evolution by how hard they push the incremental loop: more Speed while running, more Steps on treadmills, faster Win pad cycles, and cleaner rebirth prep. Pets come from hatching eggs, so every open is a bet. Use these grades to decide when to keep hatching and when to stop and spend Wins on stages, transformations, or rebirth instead.
Read this page together with the pets and eggs guide, the parent Tier List Hub, and speed farming. Tiers without route knowledge still waste hatches.
How pet tiers are scored
- Farm multiplier — raw help to Speed / Steps / Wins per minute
- Stage coverage — usefulness from Sakura through Space, not only the starter zone
- Rebirth synergy — whether the pet still matters after you reset for bigger bonuses
- Hatch cost efficiency — power gained per egg attempt at your current wallet
- Slot pressure — whether it deserves an equipped slot over the next best option
Because Kitsune Evolution is early in its life cycle, exact pet names and egg tables can expand. Grades below describe roles you should prioritize as new pets appear: always elevate companions that multiply the actions you already perform on Win pads and treadmills.
S tier — hatch priority
S-tier pets are the ones that visibly shorten runs. Prioritize companions that:
- Stack strong Speed bonuses while you traverse stage lanes
- Multiply Step gains during treadmill sessions
- Remain equipped after your first rebirth instead of becoming vanity mules
If an egg line can produce a pet that does two of those three jobs, keep hatching that line before spreading eggs across every shop option. S-tier pets fund everything else: safer Magma routes, faster Desert clears, and earlier Space attempts.
A tier — core keepers
A-tier pets are excellent defaults. They may lack the absurd multipliers of S pets but they stabilize mid-game farms through Snow, Wild West, and Magma. Keep them equipped while you chase an S upgrade. Do not delete A pets just because a shiny new C pet dropped — shiny is not a grade.
Use A pets to bridge awkward gaps when you unlocked a harder stage but have not yet earned the Wins for the next transformation. Pair them with solid treadmill habits from the speed farming guide.
B tier — situational bridges
B-tier pets shine in specific windows:
- Early Sakura / Beach when any multiplier beats none
- Temporary fillers while you save for a better egg tier
- Specialized bonuses that help one hazard-heavy route but fall off later
Promote a B pet only while it is your best available option. The moment an A or S hatch lands, demote without guilt. Incremental games punish nostalgia.
C tier — fillers
C-tier pets are inventory noise. They can sit in storage, complete a collection goal, or cover an empty slot on a brand-new account. They should not receive upgrade currency once better pets exist. If your hatch streak floods you with C results, switch egg types or pause hatching and push stages with what you have.
D tier — low priority
D-tier pets are cosmetic-first or obsolete after a single rebirth cycle. Equip them only for fun screenshots or if a quest literally requires it. Never spend premium Wins upgrading D pets when codes and stage Clears could buy real progression.
Egg investment order
- Redeem any working codes so your Win bank is honest.
- Unlock stable movement through the current stage using stages knowledge (deadly floors, rising sand, Teleport Back).
- Hatch the highest egg tier you can afford without starving rebirth savings.
- Equip the best Speed / Steps pets immediately.
- Re-evaluate after each rebirth — some pets scale, others stall.
Common mistakes
- Hatching every egg type equally instead of focusing the best available line
- Ignoring treadmill pets because stage running feels more “active”
- Selling or ignoring A pets during a dry hatch streak
- Chasing transformations while your pet slots are still empty fillers
- Forgetting that trails and forms amplify pets — they do not replace them (see transformations tier list)
Sample early-game pet plan
Minutes 0–20: Hatch whatever starter eggs you can after claiming codes. Equip anything with Speed. Follow Getting Started.
First rebirth prep: Stop panic hatching. Keep your best two farm pets locked, bank Wins, and read rebirth.
Post-rebirth: Return to the best egg you can now afford. Your multipliers should make previously expensive eggs reasonable.
Mid stages (Snow to Magma): Prefer pets that help recover after hazard deaths so Teleport Back downtime hurts less.
Desert to Space: Favor sustained treadmill and long-run multipliers over tiny early-only bonuses.
How to use this list with other pages
- Tier List Hub — criteria shared with forms and trails
- Pets and Eggs Guide — hatch mechanics and inventory habits
- Transformations Tier List — when forms outpace another pet upgrade
- Updates — patch notes that may reshuffle egg value
Pets are the quiet engine of Kitsune Evolution. Rank them by farm math, hatch with discipline, and let S-tier companions carry you from Sakura lanes all the way toward Space.
Frequently Asked Questions
Quick answers to the most common questions.
What makes an S-tier pet in Kitsune Evolution?
Clear gains to Speed, Steps, or Win pace that stay relevant after rebirth and across multiple stages — not just a rare look.
Should I hatch nonstop?
No. Hatch in focused bursts, then spend Wins on stages, treadmills, or rebirth when pet slots are already strong.
Do starter pets become useless?
Early pets often drop to C or D later. Keep them only until an A or S replacement earns the slot.
Are pets more important than trails?
Usually yes for progression. Trails polish a working loadout; pets define the loadout.
Where do I learn how eggs work?
See the Pets and Eggs guide for hatch timing, inventory tips, and how eggs fit the full loop.